
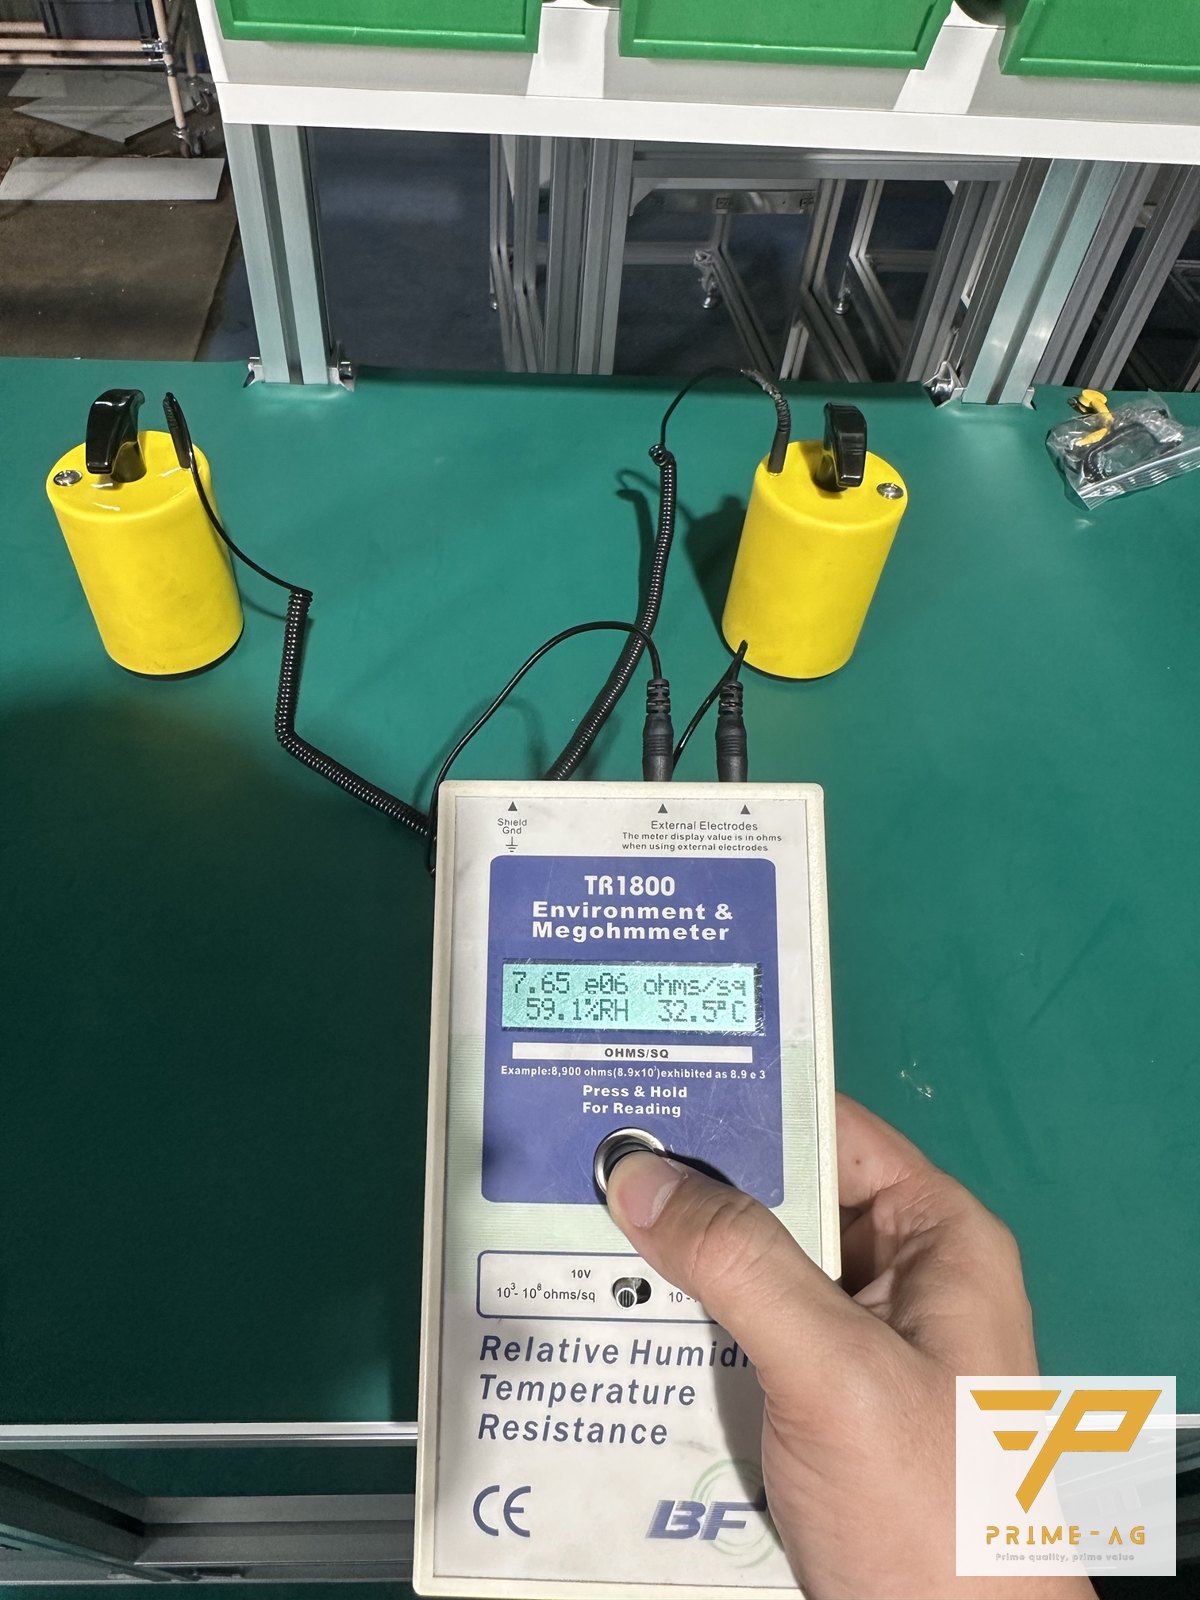
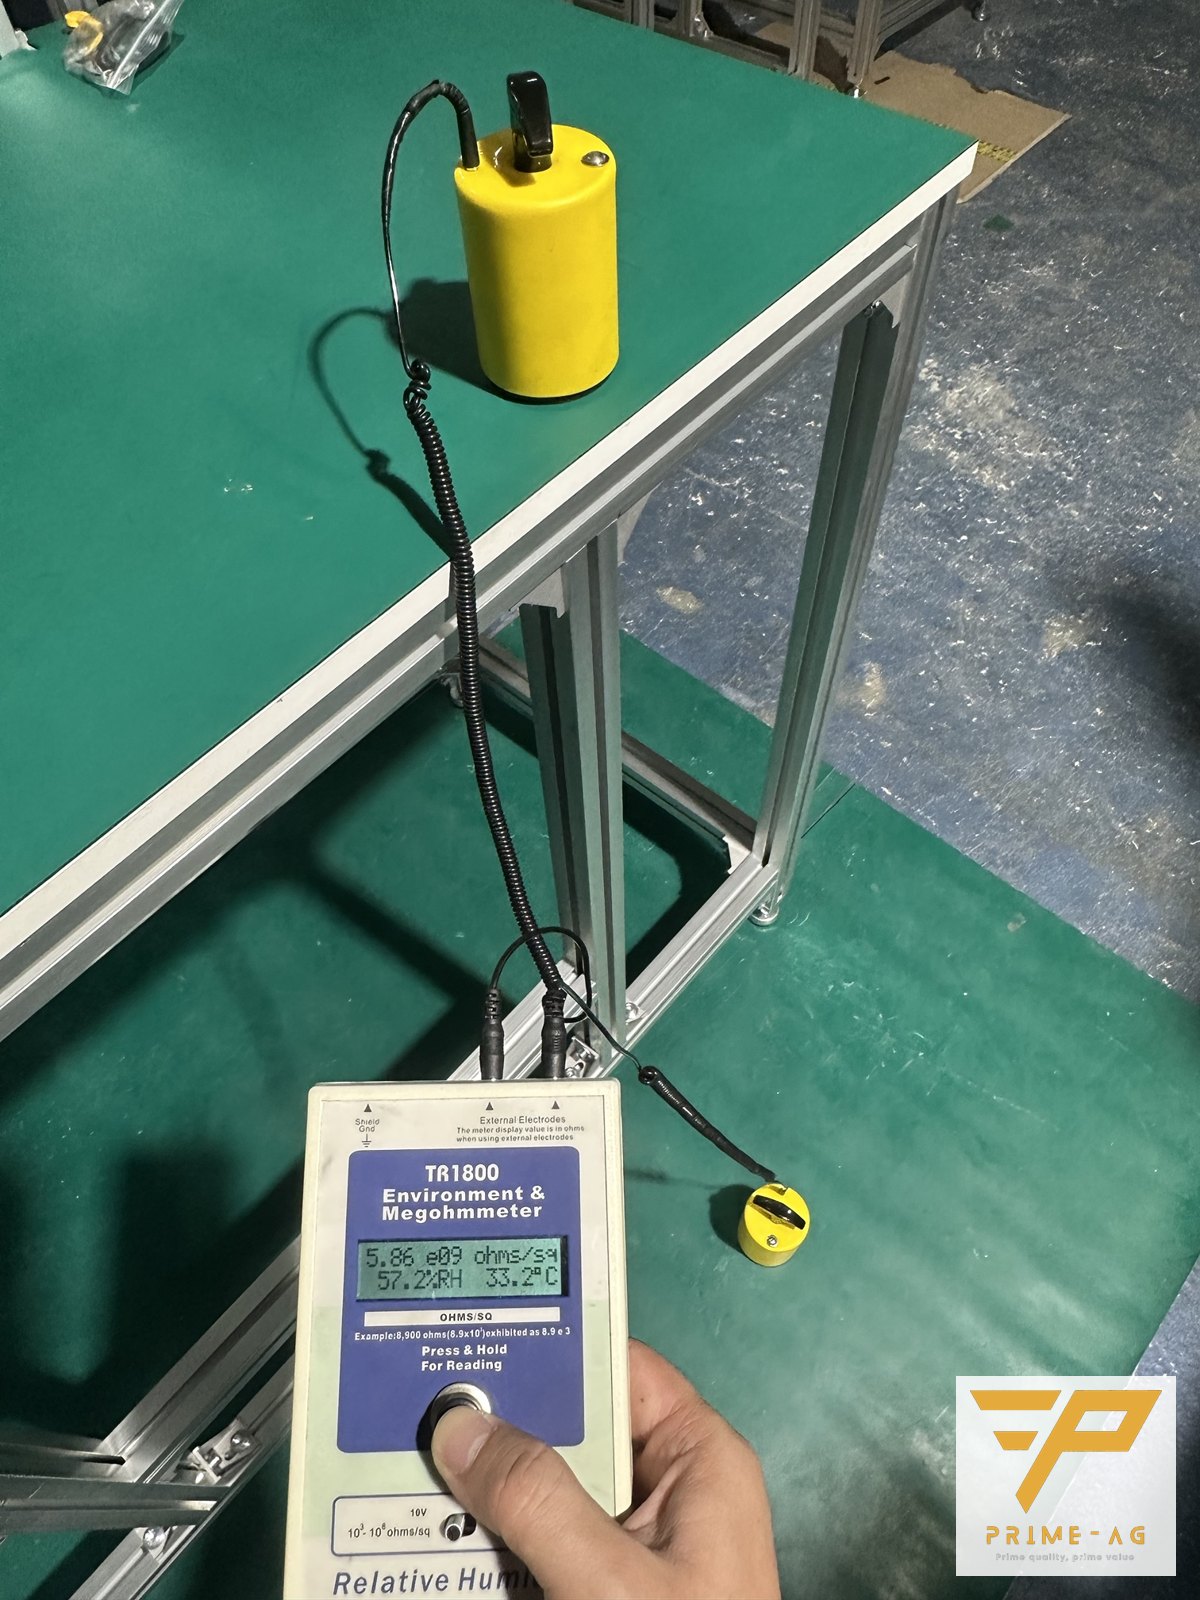
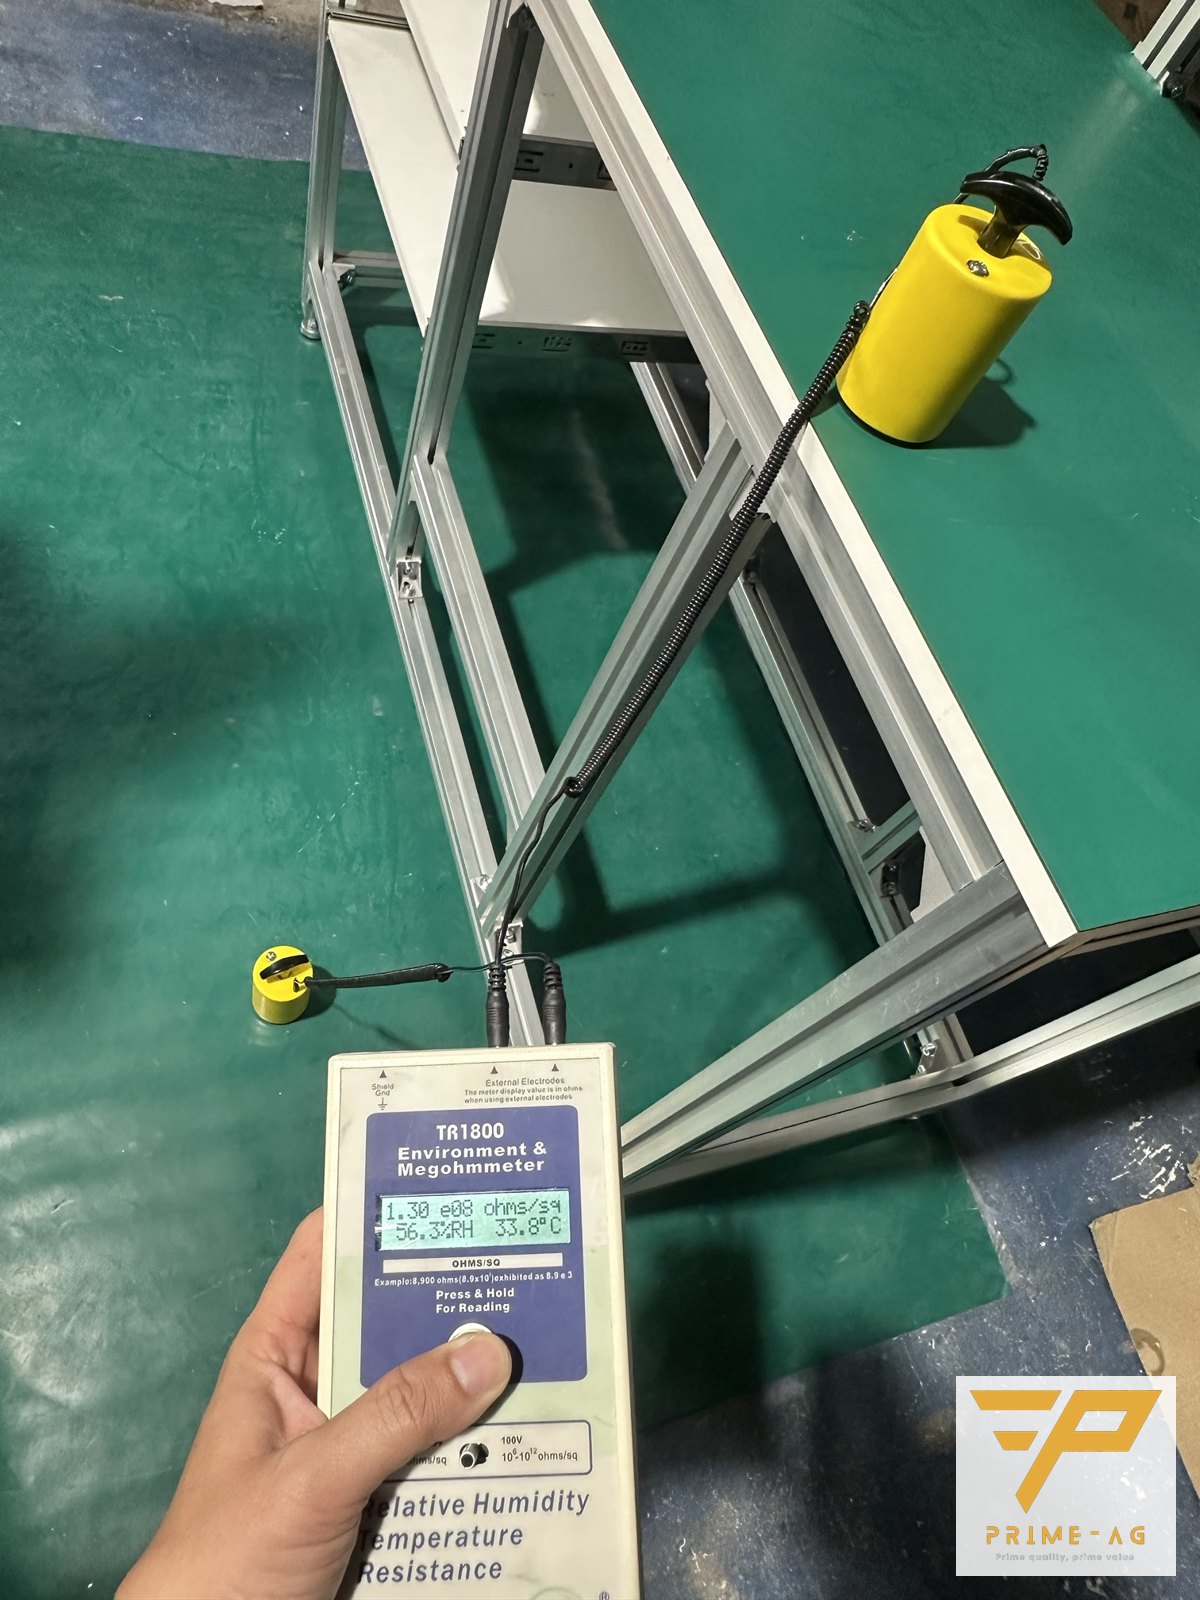
When an ESD worktop fails only in a few areas, the fault usually lies in the ground path, an insulating film, panel seams or a worn, blistered surface. PRIMEAG once measured a top mounted on an aluminum frame with no ground cord at 5.86×10⁹ Ω; after fitting a dedicated cord it read 1.30×10⁸ Ω, below the 1×10⁹ Ω limit.
During the six-month audit, QC places the electrode at the left corner of the bench top: pass. Moving to the right edge, where the line code label is stuck, the meter reads above 10⁹ Ω. A bench like this does not necessarily need a whole new top, because where the fault is usually points to its cause.
- Area-specific failures usually have a local cause.
- Check order: grounding, coatings, seams, worn surface, aluminum frame.
- Map the fault with a grid, measure each cell with the TR1800 and 5 lb electrodes, record %RH.
- Repair and clean first; replace only when the material itself is damaged.
When an ESD worktop fails in certain areas: five things to check in order
Resistance from the worktop to ground must be below 1×10⁹ Ω; when buying, choose a 10⁶–10⁹ Ω material. If one area exceeds the limit, check in turn:
- Areas far from the ground point. A loose snap, an overstretched ground cord or a dirty snap base raises resistance in the cells farthest from the snap first.
- Insulating films. Tape, labels, protective film not yet peeled off, or a thin film left by silicone-based cleaners or wax.
- Seams. Joined panels do not conduct across the gap, so each panel needs its own path to ground; a 2-layer mat delaminating at the edge also loses conductivity.
- Scratched, worn or blistered surface. Laminate worn where arms rest, blistered by a soldering iron placed in the wrong spot, or attacked by chemicals. Cleaning cannot restore it.
- Anodized aluminum frame. The anodized oxide layer is insulating, so a top fixed to the frame does not ground itself – see the two measurement photos above.
Mapping the fault with a grid
Draw a grid on a paper sketch and measure point-to-ground in each cell per ANSI/ESD STM 4.1 with the TR1800 surface resistance meter and a 5 lb electrode, record %RH, shade the failing cells red, then compare with the table.
| Failing area | Common cause | Fix |
|---|---|---|
| Corners and edges far from the ground snap | Loose snap, damaged ground cord | Tighten or replace the snap, check the cord |
| Where labels or tape are stuck | Insulating film, silicone/wax cleaner | Peel off, wipe with IPA, change the cleaning agent |
| Along the joint between two panels | Panel without a path to ground, delaminated mat | Ground each panel, replace delaminated mats |
| Soldering area, arm-rest area | Worn laminate, heat blistering, chemicals | Replace the board or mat |
| Whole top fixed to an aluminum frame | Non-conductive anodized layer | Fit a dedicated ground cord |
Mats whose resistance gradually rises: see the guide ESD mat measuring above 10⁹ Ω after 6 months.
Clean, repair or replace
Dirt, films, grounding: repair and re-measure. Blistered or worn laminate: replace with a pre-cut moisture-resistant MDF board with ESD laminate; for mat-covered benches use the 2-layer ESD rubber mat, which PRIMEAG cuts to your bench size. If an old frame is deteriorating, consider a lean pipe (plastic-coated steel pipe) workbench (3-year frame warranty, 12 months on the ESD top). After replacement, sign off using the 5-step ESD workbench acceptance procedure.
Real project
A Taiwanese-invested electronic components factory in Da Nang, 2024–2025: PRIMEAG supplied about 500 ESD benches with lamps, power sockets and ground cords, delivered in 4 batches.
Where to start
- Do one round of measurements following the grid sketch and fix the cheapest things first: wipe, peel labels, tighten snaps, add cords for aluminum frames.
- If your workshop has no meter, invite PRIMEAG to your factory in Ho Chi Minh City, Binh Duong or Dong Nai for free on-site grid testing of every worktop in use, including benches bought elsewhere, and receive a PDF report by position showing which areas fail (for reference only, not an audit document).
- EPEs (export processing enterprises) ordering from VND 20 million: 0% VAT invoice, and PRIMEAG prepares the on-the-spot import/export customs declaration free of charge.
Frequently asked questions
- Why does the point-to-point test pass but point-to-ground fail? — Point-to-point only checks the surface; point-to-ground also checks the path through the snap, cord and frame. It is usually a loose snap or an aluminum frame without its own cord.
- What should I clean an ESD worktop with so the readings are not affected? — Use IPA or an ESD cleaning solution. Avoid cleaners containing silicone or wax because they leave an insulating film.
- How often should worktops be re-tested? — ANSI/ESD S20.20 does not set a frequency; benches and mats are usually tested every 6 months, high-risk areas monthly or quarterly.
Mon–Sat, 8:00–17:00 (GMT+7) · Phone/Zalo: +84 906 108 292 · Email: info@primeag.vn
Start where it suits you: Free technical advice · Send a drawing or layout · Get a quote within 30 minutes
Written by the PRIMEAG engineering team
Updated: 2026-10-25